
Building a custom keyboard is about more than just choosing a color—it is about creating a masterpiece that is 100% unique to you. With our custom builder, you can personalize everything from the magnetic switches to the exact language, typing layout, and artwork on your keycaps.
If you are wondering how to navigate the customization options on our product page, this step-by-step guide will show you exactly how to build your dream keyboard.
Choose Your Base & Hardware
Before designing the look, let's build the foundation:
- PCB Edition: Choose between our Standard Edition (great for daily use) or Pro Edition (upgraded firmware, ultra-low latency, and advanced features like Snap Tap).
- Case Material & Color: Select premium CNC Aluminum for a heavier, "thocky" sound, or Polycarbonate/Acrylic for vibrant RGB lighting.
- Magnetic Switches: Select your preferred hot-swappable magnetic switches based on your desired typing weight (e.g., lighter for fast gaming, heavier for typing).
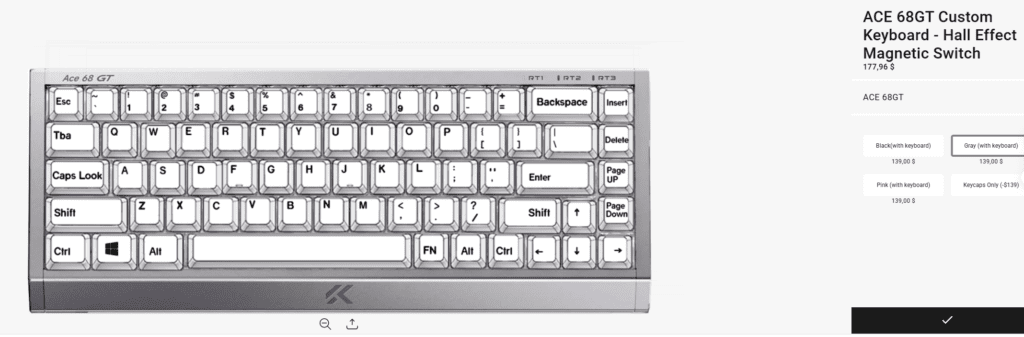
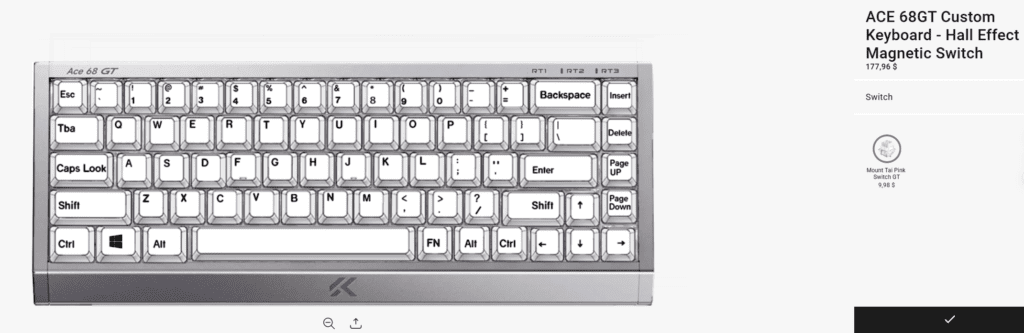
Select Your Keycap Layout
Choosing the correct layout is crucial to ensure your keycaps fit your muscle memory and regional standards. On our product page, you will customize the arrangement of your letters based on our standard physical board.
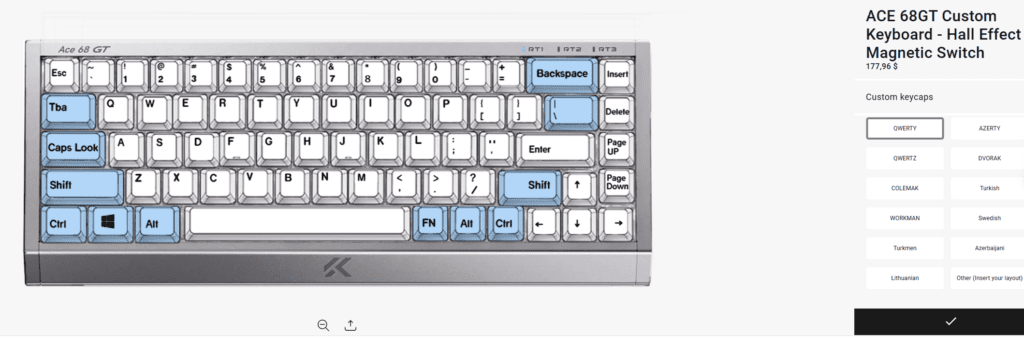
2. Typing Layouts (Alphanumeric Arrangement): Even with a standard ANSI board, we support a massive variety of typing layouts to suit your exact needs. From the dropdown menu, you can choose:
- Standard & Ergonomic Layouts: QWERTY, DVORAK, COLEMAK, WORKMAN.
- Regional Layouts: AZERTY, QWERTZ, Swedish, Turkish, Azerbaijani, Turkmen, Lithuanian.
- Other (Insert your layout): Don't see your specific layout in the list? No problem! Simply select "Other" and a text box will appear. Type your desired layout into the box, and we will custom-make it for you!
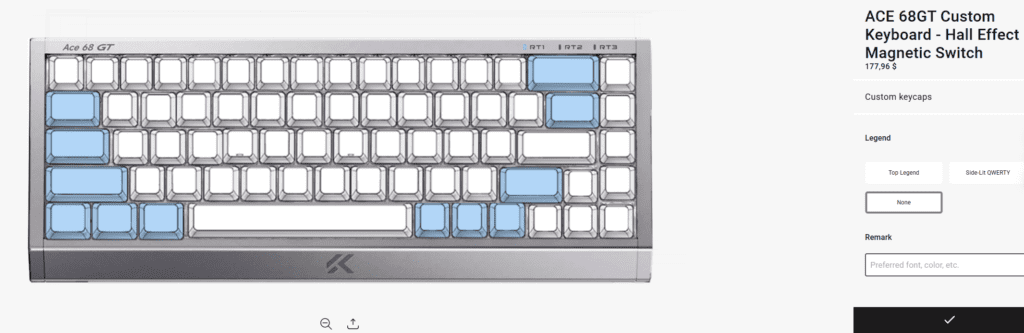
Customize Your Keycap Legends (Text & Languages)
This is where you make the keyboard visually yours. Here is what each text option means:
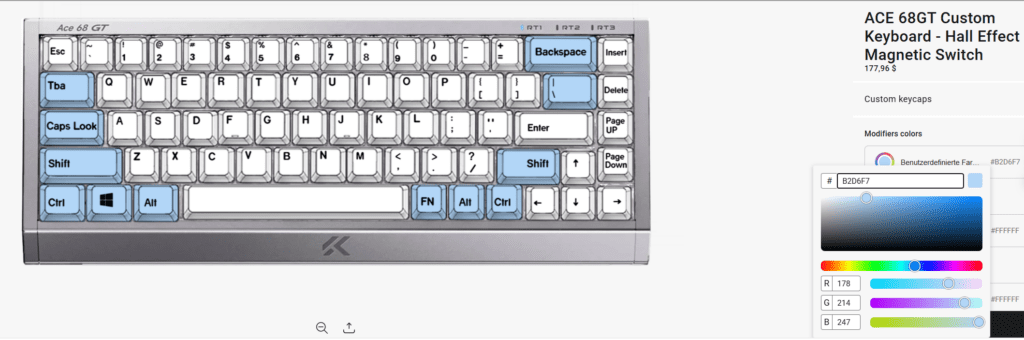
- Legend: This is the primary language or main character printed on the center of the keycaps. You can also choose "Blank" if you prefer a minimalist look with no text.
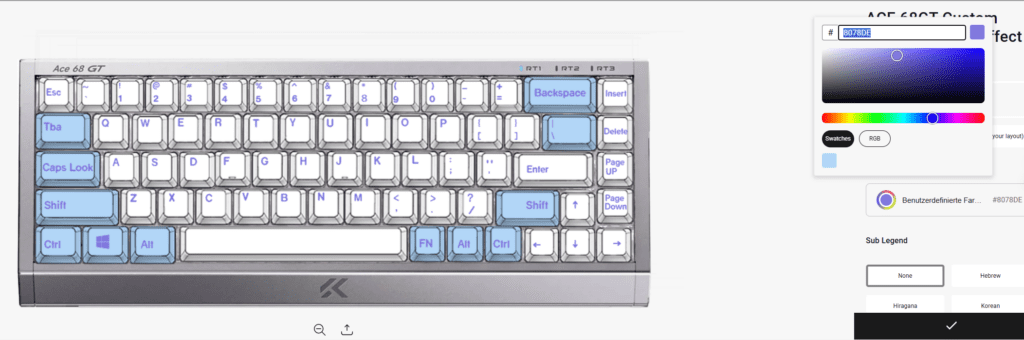
- Legends Color: Choose the color of the text. Make sure to pick a color that contrasts well with your keycap background (e.g., White text on Black keycaps, or Black text on White keycaps) for the best visibility.
- Sub Legend: This is the secondary language printed alongside the main Legend (usually in the corner of the keycap). We offer popular options like Japanese (Hiragana), Korean, Russian, Arabic, and Hebrew. This is perfect for bilingual users or those who love the aesthetic of dual-language keycaps.
- Other (Insert sub legend): Just like the layout option, if you can't find your desired secondary language, select "Other" in the Sub Legend dropdown. Type your specific language or characters into the text box, and we will print it for you.
How to Upload Custom Images & Logos
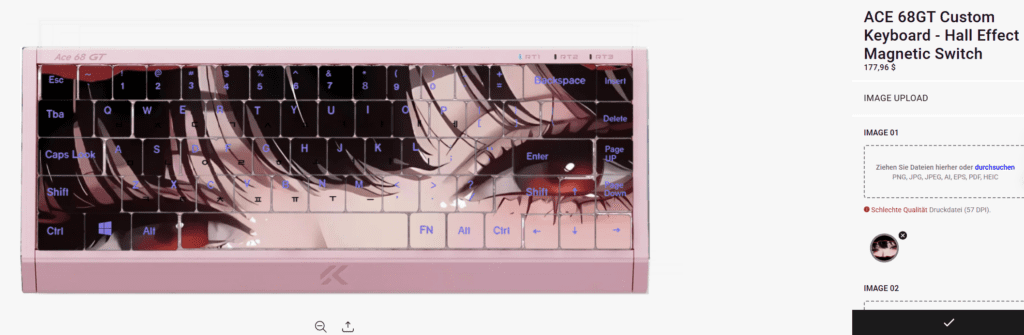
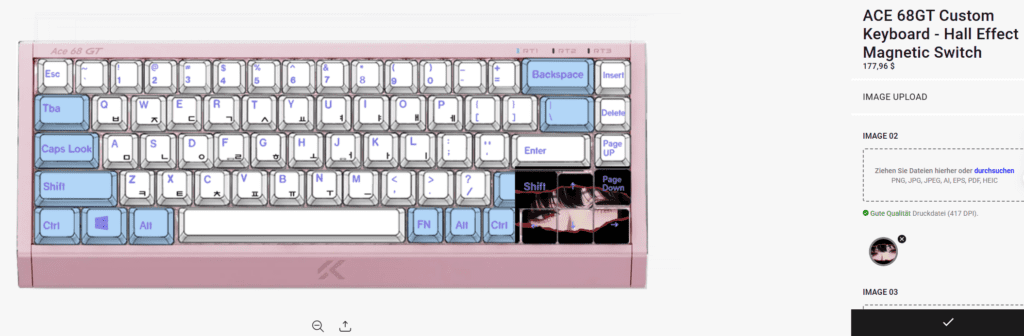
Want to add your own logo, anime character, or custom artwork to your keyboard? You can use our Image Upload feature to print custom graphics onto specific keys (like the Spacebar or Esc key) or across the entire keyboard case!
How to use the Image Upload feature:
- Prepare Your File: Ensure your image is high-resolution for the best print quality. We recommend using PNG or JPG formats. If your image has a transparent background (like a standalone logo), please use a PNG file.
- Click "Upload Image": Find the image upload button on the product page and select the file from your computer or phone.
- Leave Instructions (Optional but Recommended): If there is a specific place you want the image printed (e.g., "Please print this logo on the Escape key" or "Center this artwork on the Spacebar"), please leave a note in the order remarks or customization text box.
Add to Cart & Unlock Software Features
Once you have perfected your design, add the keyboard to your cart!
After your custom keyboard arrives, the personalization continues. Download our software to unlock the full power of your Hall Effect PCB:
- Customize Actuation Points (from 0.1mm to 4.0mm).
- Enable Rapid Trigger for instant key resets in FPS games.
- Activate Snap Tap for perfect in-game movement.
- Set up your custom RGB lighting to match your new keycap design!
Ready to Build Your Masterpiece?
Head over to our custom builder and start designing your ultimate Hall Effect Keyboard today.
Start Building Your Custom Keyboard Now!
 English
  German
  Portuguese
  Spanish
  Italian
  Finnish
  French
  Japanese
  Korean
  Swedish