Que vous ayez renversé votre café du matin, que vous souhaitiez passer à un jeu de touches personnalisé ou que vous ayez simplement besoin d'effectuer un nettoyage en profondeur pour éliminer des années de poussière et de miettes accumulées, savoir Comment retirer les touches d'un clavier ? est une compétence essentielle pour tout utilisateur de PC ou joueur.
Bien que cela puisse paraître simple, une mauvaise manipulation peut endommager vos touches, les interrupteurs mécaniques ou les stabilisateurs fragiles situés en dessous. Ce guide complet vous expliquera la méthode la plus sûre et la plus efficace pour retirer vos touches, nettoyer votre clavier et tout remonter.
Pourquoi vous pourriez avoir besoin de retirer vos touches de clavier
Il existe trois raisons principales pour lesquelles vous devriez apprendre à retirer les touches de votre clavier :
- Nettoyage en profondeur : Avec le temps, des cheveux, de la poussière et des particules alimentaires s'accumulent sous les touches. Retirer les touches est le seul moyen de nettoyer correctement le clavier.
- Personnalisation : Remplacez vos touches d'origine par des jeux de touches PBT personnalisés, des touches artisanales ou des coloris différents pour les assortir à votre configuration de jeu.
- Entretien: Réparer un interrupteur récalcitrant ou remplacer une touche cassée permet de prolonger la durée de vie de votre clavier mécanique.
Outils essentiels pour le travail
Avant de commencer à démonter les choses, il vous faut les bons outils.
- Un extracteur de touches (Fortement recommandé) : C'est l'outil le plus sûr pour cette tâche. Les extracteurs de touches à fil sont les meilleurs car ils se glissent facilement sous la touche et ne la rayent pas.
- Ce qu'il NE FAUT PAS utiliser : Pendant que vous peut Utilisez des objets du quotidien comme un tournevis plat, un couteau à beurre ou une clé de voiture en cas d'urgence., Nous le déconseillons fortement.. Les objets métalliques peuvent facilement rayer vos touches, bosseler le plastique, voire même casser l'interrupteur mécanique situé en dessous.
Tutoriel étape par étape : Comment retirer les touches d’un clavier
Suivez ces étapes pour garantir un processus de retrait sans encombre et sans dommage.
Étape 1 : Débranchez et prenez une photo
Commencez par débrancher votre clavier de votre ordinateur. Si votre clavier possède un rétroéclairage RGB lumineux, les LED peuvent fatiguer vos yeux pendant que vous travaillez. Ensuite, Prenez une photo nette de la disposition de votre clavier avec votre téléphone. Mémoriser l'emplacement de chaque touche est bien plus difficile qu'il n'y paraît, et cette photo vous sera d'une grande aide lors du remontage.
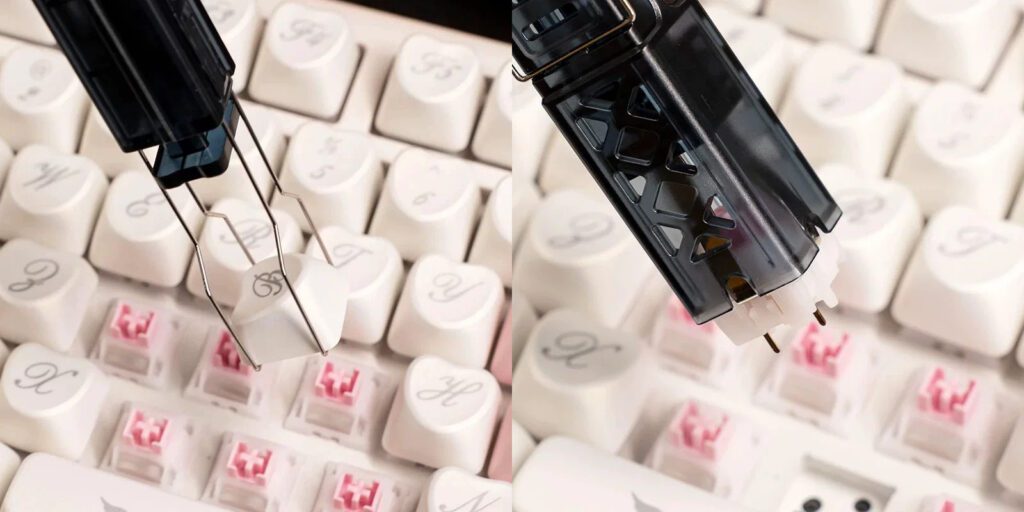
Étape 2 : Positionnez l’extracteur de touches
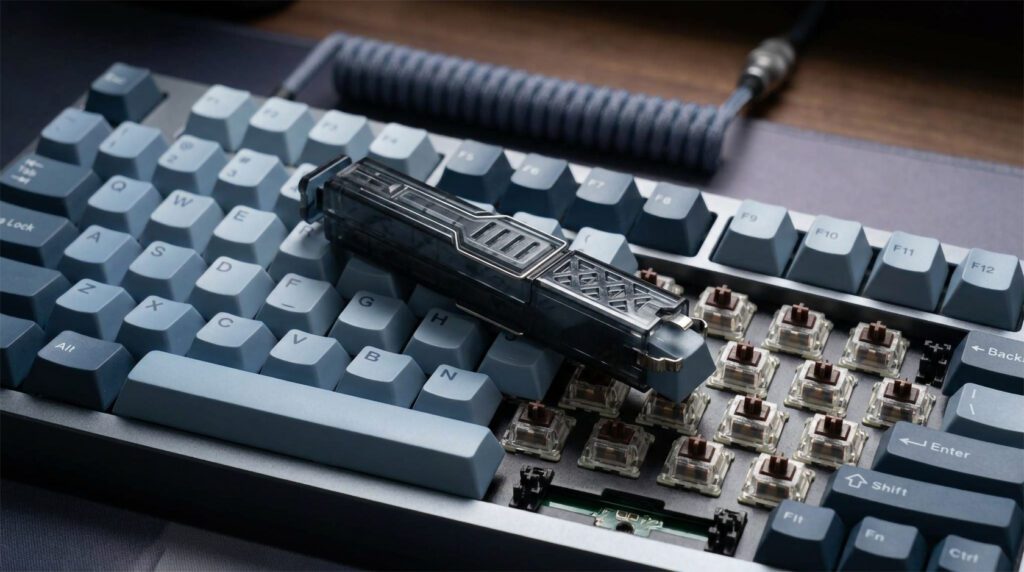
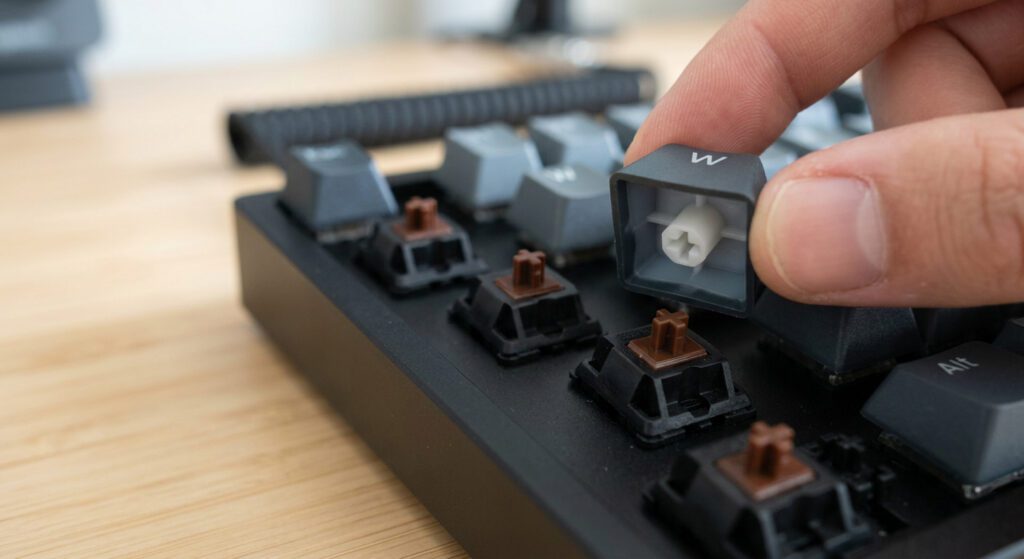
Prenez votre extracteur de touches (à fil ou à anneau) et appuyez-le directement sur la touche. Assurez-vous que les deux côtés de l'extracteur se glissent sous les bords inférieurs de la touche et s'y accrochent fermement.
Étape 3 : Tirez droit vers le haut
Une fois l'extracteur en place, tirez doucement mais fermement vers le haut. La touche devrait se détacher de l'interrupteur mécanique. Évitez de faire bouger l'extracteur trop brusquement de gauche à droite, car cela pourrait endommager la tige de l'interrupteur.
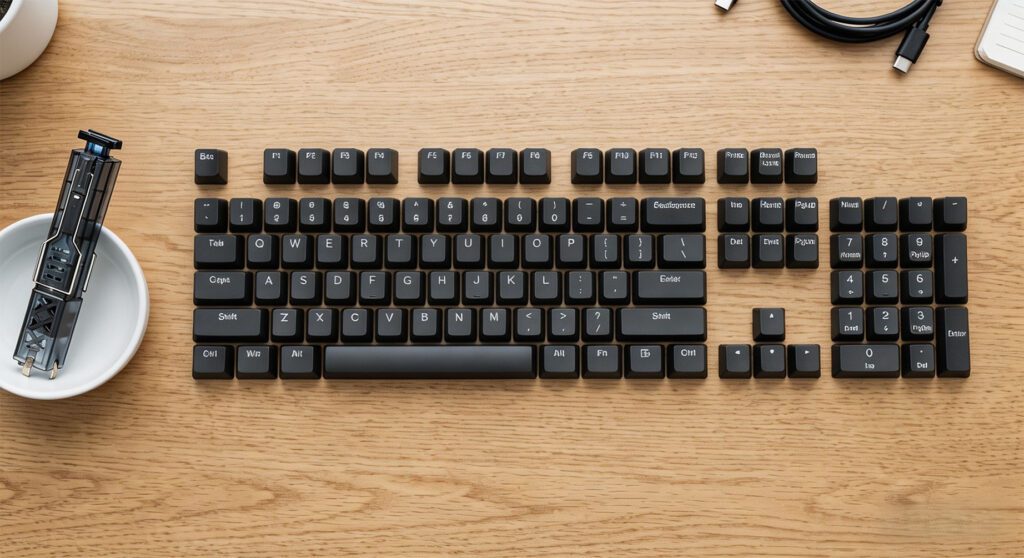
Étape 4 : Organisez-vous au fur et à mesure
Au lieu de jeter toutes vos touches en désordre, disposez-les sur votre bureau en respectant exactement leur disposition sur votre clavier. Le remontage sera ainsi incroyablement rapide.
Étape 5 : Faites attention aux grandes clés
Portez une attention particulière aux touches plus grandes comme les Barre d'espace, Entrée, Maj et Retour arrière. Ces touches sont souvent soutenues par des barres stabilisatrices métalliques (pôles d'équilibrage) ou des commutateurs satellites.
- Tirez-les très lentement.
- Si vous sentez une résistance au niveau d'une barre métallique, faites glisser délicatement la touche hors de la barre plutôt que de l'arracher vers le haut, ce qui pourrait plier ou casser le mécanisme de support délicat.
Bonus : Un guide rapide du nettoyage
Une fois que vous avez compris comment retirer les touches de votre clavier, autant les nettoyer !
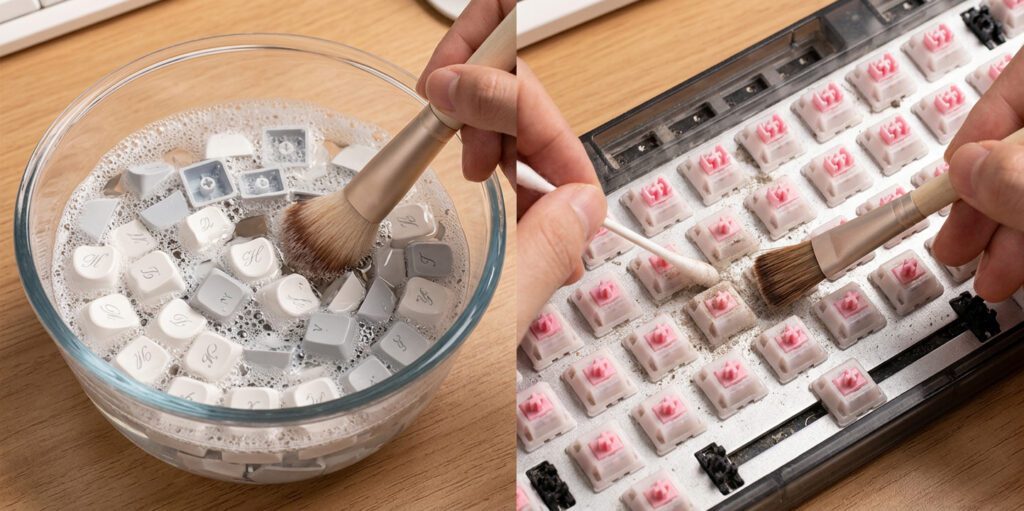
- Lavez les touches : Plongez les touches en plastique dans un grand bol d'eau tiède savonneuse (non bouillante). Laissez-les tremper, remuez-les un peu, puis rincez-les.
- Nettoyer le tableau : Utilisez une petite brosse pour enlever les cheveux et les miettes de la plaque du clavier. Pour les résidus collants, utilisez un coton-tige imbibé d'alcool isopropylique.
- Sécher complètement : Étalez les touches sur une serviette en papier et laissez-les sécher complètement à l'air libre avant de les remettre en place. N’installez jamais de touches humides, car l’eau peut endommager le circuit imprimé de votre clavier.
Comment remettre les touches en place
Remettre en place les touches est bien plus simple que de les retirer. Ouvrez la photo prise à l'étape 1. Alignez la tige en forme de croix de la touche avec la croix du commutateur mécanique et appuyez fermement jusqu'à entendre un clic.
Pour les touches plus grandes avec stabilisateurs, assurez-vous d'aligner correctement les barres de support avant d'appuyer. Si vous rencontrez une forte résistance, arrêtez-vous, retirez la touche, réalignez-la et réessayez.
Foire aux questions (FAQ)
Est-il possible de retirer les touches d'un clavier d'ordinateur portable ou d'un clavier à membrane ? Ce guide concerne principalement les claviers mécaniques. Les touches des ordinateurs portables utilisent des mécanismes à ciseaux fragiles qui se cassent très facilement. Il est généralement déconseillé de retirer les touches d'un ordinateur portable, sauf en cas d'absolue nécessité.
Dois-je utiliser un extracteur de touches ? Bien qu'il soit possible d'improviser, un extracteur de touches coûte quelques euros seulement et vous garantit de ne pas rayer ni endommager définitivement votre précieux clavier. Son utilisation est fortement recommandée.
À quelle fréquence dois-je retirer les touches de mes touches pour les nettoyer ? Pour les utilisateurs intensifs ou les joueurs, un nettoyage en profondeur par retrait des touches tous les 3 à 6 mois est idéal pour maintenir une configuration hygiénique et un fonctionnement parfait.