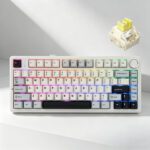
If you’ve just unboxed your first 60% keyboard, you’ve probably noticed something unsettling: the arrow keys are gone, the tilde seems to have vanished, and there’s no obvious way to turn the volume down. Don’t worry — nothing is broken. These keys are simply tucked away on a hidden secondary layer, waiting for one magic key to unlock them.
This guide walks you through the three most common beginner puzzles on a compact keyboard: moving the cursor, typing the tilde (~), and adjusting volume. Every solution relies on the same principle — the FN modifier key plus a combination keystroke. We’ll cover the standard layouts shared across most brands, note the small differences between manufacturers, and finish with a few standout Hall-effect 60% keyboards worth considering if you’re ready to upgrade.
Let’s unlock those hidden functions step by step.
Why 60% Keyboards Hide These Keys
Before diving into shortcuts, it helps to understand the logic behind the design.
A 60% keyboard removes the number pad, function row, navigation cluster, and dedicated arrow keys to save desk space and shorten hand travel. But those functions aren’t deleted — they’re layered underneath existing keys.
Think of it like a second floor in a house: the FN key is the staircase. Hold it down, and every key temporarily switches to its alternate function. Release it, and you’re back to normal typing.
This means three things for you:
- No keys are truly missing — they’re just on layer two.
- Most brands follow common standards, so skills transfer between keyboards.
- Minor brand differences exist, which is why we’ll flag them as we go.
Chapter 1: How to Use Arrow Keys on a 60% Keyboard
Arrow keys are the single most-missed feature for newcomers. Here’s how to get your cursor moving again.
Core Working Principle
On a 60% board, the arrow keys are embedded into the alphanumeric layer and triggered by holding FN + a base letter key. There are two mainstream mapping schemes, and your keyboard almost certainly uses one of them.
Two Popular Standard Shortcut Combinations
The layout you have usually depends on whether your keyboard leans toward gaming or touch typing.
Scheme 1 — WASD Gaming Layout (common on Keychron, Ducky)
| Direction | Atalho |
|---|---|
| Up | FN + W |
| Down | FN + S |
| Left | FN + A |
| Right | FN + D |
Scheme 2 — IJKL Touch-Typist Layout (common on Anne Pro, Vortex)
| Direction | Atalho |
|---|---|
| Up | FN + I |
| Down | FN + K |
| Left | FN + J |
| Right | FN + L |
O IJKL layout keeps your hand closer to the home row, which many fast typists prefer. The WASD layout feels natural for gamers already used to that cluster.
Advanced Compound Shortcuts for Editing
Once you’re comfortable with the basics, these combinations make text editing genuinely fast:
Ctrl + FN + Arrow→ Skip an entire word left or rightShift + FN + Arrow→ Select a segment of text- Combine with the
Lar/Fimlayer shortcut → Select an entire line at once
Customization Tip
If neither layout suits your habits, you can remap the arrow positions using VIA or QMK software. This lets you place the arrows wherever your fingers naturally reach — a small change that pays off every day.
Chapter 2: How to Input the Tilde (~) on a 60% Keyboard
The tilde is small but mighty — essential for coding, file paths, and certain languages. Here’s where it hides.
Default Standard Tilde Position
On a full-size keyboard, the tilde lives in the top-left corner beside ESC. On most 60% boards, that same key has been moved to the FN layer, typically on the grave accent or number 1.
Three Common Combination Methods
Depending on your board’s layout, one of these will produce the ~ symbol:
- Default mainstream: Hold
FN + Grave Accent(the`key just below ESC) →~ - Alternative layout:
FN + 1on some budget models (e.g., certain Redragon boards) - ISO layout special case:
FN + the symbol key adjacent to left Shift
Troubleshooting: Can’t Type the Tilde
If the shortcut isn’t producing a tilde, the problem is usually software, not hardware:
- Switch your system input language — English (US) is the most reliable for standard symbol mapping.
- Remap the symbol key through a keyboard configurator if a fixed mapping is causing a conflict.
Chapter 3: How to Adjust Volume on a 60% Keyboard
Reaching for your mouse to change volume gets old fast. Here’s how to control audio directly from the keyboard.
Basic Volume Shortcut Logic
Media controls are bound to the FN + F-key layer. The keys F9 through F12 are the global mainstream positions for media functions across most brands.
Most Widely Used Volume Shortcuts
| Action | Atalho |
|---|---|
| Volume Up | FN + F10 |
| Volume Down | FN + F9 |
| Mute / Unmute | FN + F11 |
These three cover nearly every daily need — bumping audio up during a call, dropping it for a meeting, or muting instantly.
Two Special Layout Cases
Not every board follows the F-key convention. Watch for these alternatives:
- Compact layout variant: Volume mapped onto
FN + the +/- keysof the number row. - Hot-swappable custom boards: Edit the media mapping directly in VIA or QMK to place it wherever you like.
System Setting Fix: Volume Shortcut Not Working
If pressing the combo does nothing, check the software side:
- Verify your keyboard driver is installed and up to date.
- Check for media hotkey conflicts — another app or system setting may be occupying the same shortcut.
Chapter 4: Common Troubleshooting Summary
When a shortcut misbehaves, run through this quick checklist before assuming a defect.
- Combination won’t trigger: Confirm the FN key lock isn’t accidentally enabled.
- Inconsistent shortcuts: Remember that different brands have tiny mapping gaps — always check the official manual for your specific model.
- Want full control: Usar open-source QMK / VIA software to remap all three sets of shortcuts — arrows, tilde, and media — exactly to your liking.
The key takeaway: most issues are configuration, not hardware. A two-minute software check solves the vast majority of problems.
Chapter 5: Recommended Premium 60% Hall-Effect Keyboard Picks
If this guide convinced you to upgrade, here are three standout Hall-effect 60% keyboards. All of them use the standard layered FN mapping covered above, so every arrow, tilde, and volume shortcut you just learned will work right out of the box.
Teclado de efeito Hall AULA AG60
O Teclado de efeito Hall AULA AG60 features a CNC aluminum chassis paired with an 8000Hz polling rate and adjustable magnetic switch actuation. Ships with the layered FN layout enabled by default, making it a cost-effective pick for both daily office work and gaming.
MADLIONS MAD LIGHT 60HE Keyboard
Built around a CNC-machined aluminum case, the MADLIONS MAD LIGHT 60HE Keyboard comes equipped with Huannuo Tianqi magnetic switches and an ultra-low 0.1ms response time. It comes pre-set with standard WASD-based FN shortcuts for arrow and volume control.
Wooting 60HE V2 Full-Mod Custom Keyboard
O Wooting 60HE V2 Full-Mod Custom Keyboard boasts a solid aluminum shell with fully adjustable analog Hall switches and complete Wootility software remap support. It is ideal if you want to freely customize every FN-layer shortcut — arrows, tilde, and media keys included.
Final Takeaways
Here’s the big picture: every “missing” key on a 60% keyboard — arrows, tilde, and volume — is simply resting on the FN secondary layer. Once you internalize that single concept, the rest falls into place:
- Arrows:
FN + WASDouFN + IJKL - Tilde:
FN + Grave Accent(orFN + 1) - Volume:
FN + F9 / F10 / F11
The real advantage of going 60% is the combination of a clean, compact desktop e fully customizable key functions. With QMK or VIA, you’re never locked into a brand’s defaults — you shape the keyboard around your habits, not the other way around.
If you’re ready to make the leap, any of the Hall-effect models above will give you that flexibility on day one. Happy typing.