
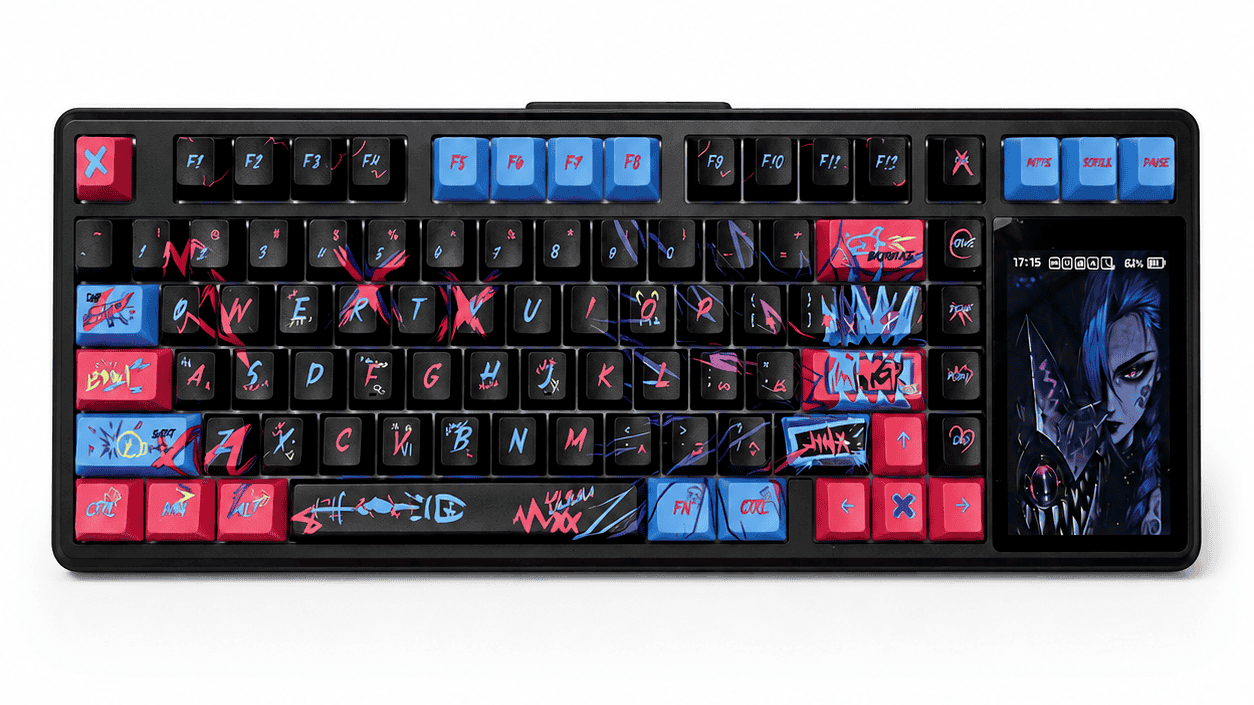
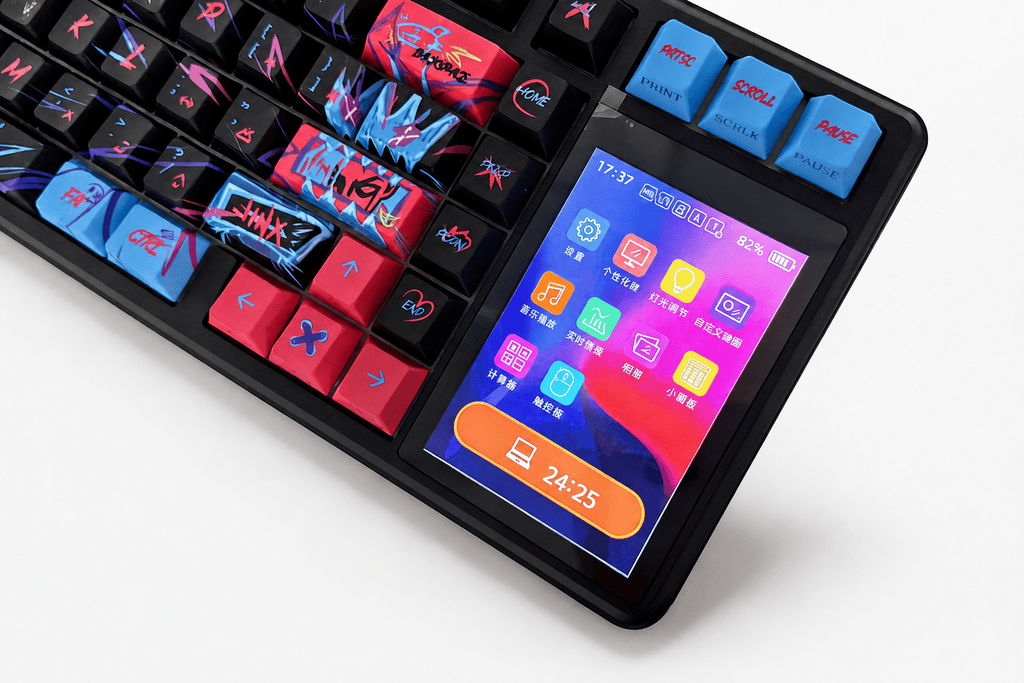
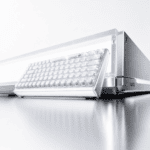
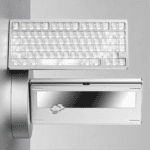
그만큼 AULA L99 mechanical keyboard stands out for one particularly eye-catching feature: its 3.98-inch full-color IPS touchscreen. It can display custom animations, provide quick-access tools, and turn the keyboard into a more personalized desktop control center.
However, when you first connect the keyboard and open its software, the number of settings can feel slightly overwhelming. Where do you upload a GIF? How do you record a macro? Why is the software not detecting the keyboard?
This beginner-friendly AULA L99 setup guide walks you through the entire process—from installing the correct driver to uploading your first animation and creating a custom gaming macro.
1. Before You Begin: Install the AULA L99 Driver
Before changing the touchscreen, lighting, key assignments, or macros, you need software that supports the correct L99 model.
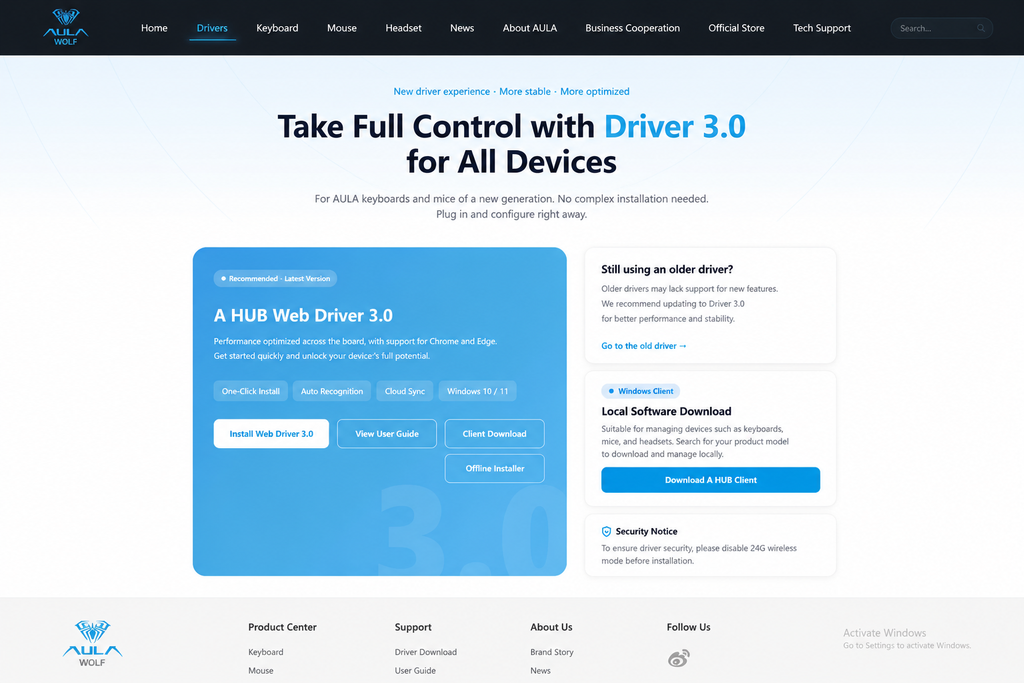
1.1 Download the Correct Driver
Avoid downloading keyboard drivers from random file-sharing sites or unverified search results. These packages may be outdated, incompatible, modified, or unsafe.
Use the following process instead:
- Visit AULA’s official support or download center.
- Check the exact model printed on the keyboard label or packaging.
- Select the driver specifically designed for the AULA L99.
- Follow AULA’s instructions for the compatible version of A HUB.
Depending on your region and product revision, AULA may provide either a browser-based configuration tool, a Windows client, or both.
Browser-Based Driver
A browser-based version can be convenient because it does not require a traditional installation.
For the best compatibility:
- Use a current version of Chrome or Edge.
- Allow the browser to access the connected device when prompted.
- Connect the keyboard using its USB cable.
- Close other keyboard configuration programs that may interfere.
Windows Client
The desktop client is generally better for users who want offline access or prefer a dedicated configuration application.
Always download it from an official AULA source and confirm that the listed model matches your keyboard.
중요한: Software names, menu labels, and available functions can differ between driver and firmware versions.
1.2 Install and Connect the Keyboard
Follow these steps when installing the Windows client:
- Close any other keyboard or peripheral configuration software.
- Download the correct installer from the official source.
- Right-click the installation file.
- 선택하다 Run as administrator.
- Follow the on-screen installation instructions.
- Allow network or firewall access if the official software requires it.
- Connect the L99 with its USB Type-C cable.
- Switch the keyboard to wired mode if necessary.
- Open A HUB and wait for device detection.
For initial customization, wired mode is usually the most reliable option. Some settings may not be available while the keyboard is connected through Bluetooth or 2.4GHz wireless mode.
2. How to Upload a GIF to the AULA L99
Uploading a custom animation is one of the easiest ways to make the AULA L99 feel like your own. Instead of leaving the screen on its default interface, you can display a favorite character, team logo, short animation, or personal design.
2.1 AULA L99 Screen Specifications
The L99’s display is designed to work as both a visual feature and an interactive control panel.
| Screen Feature | 사양 |
|---|---|
| Display type | IPS color touchscreen |
| Screen size | 3.98 inches |
| Resolution | 320 × 480 pixels |
| Custom media | GIF animations and JPG images |
| Other functions | Numpad, calculator, settings and mouse control |
The screen uses a vertical orientation. Preparing your image at or near 320 × 480 pixels can help reduce cropping and distortion.
2.2 Prepare Your GIF or JPG
Before uploading a file, check the following:
- Use a supported GIF or JPG file.
- Resize the image to a vertical 320 × 480 layout when possible.
- Keep the main subject near the center.
- Avoid tiny text that will be difficult to read on the display.
- Use a shorter GIF if the software rejects a large file.
- Optimize the animation to reduce unnecessary frames and file size.
A simple, clean animation often looks better than a highly detailed scene. This is a keyboard screen, not a pocket cinema—although it will certainly try its best.
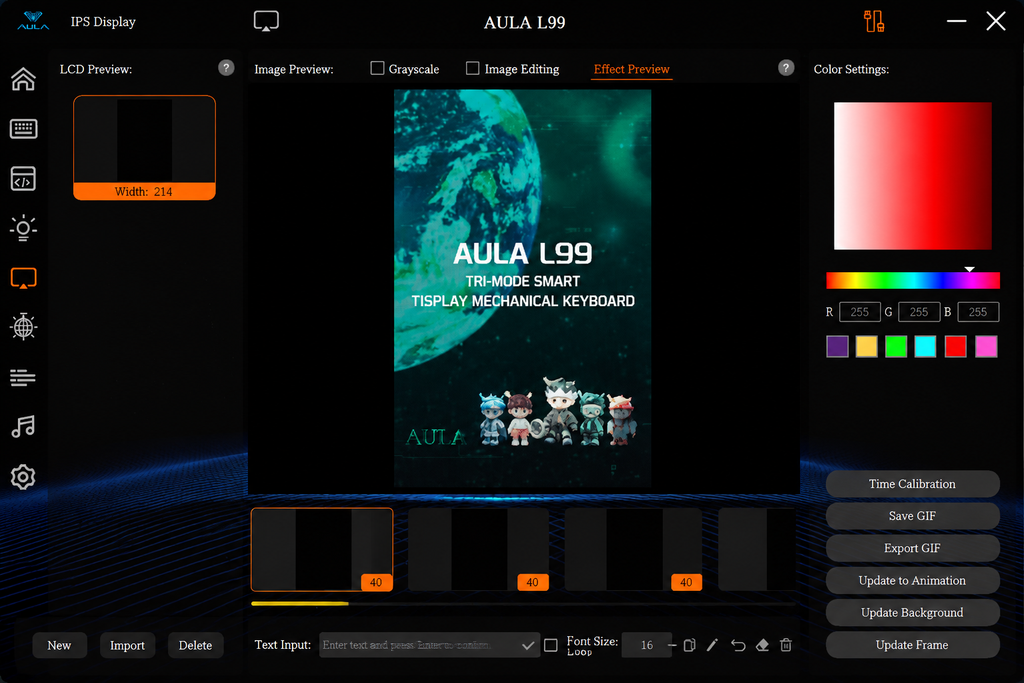
2.3 Upload Your First Custom GIF
The exact labels may vary, but the general process is:
- Connect the AULA L99 using its USB cable.
- Open the compatible A HUB software.
- Select the L99 from the device list.
- Find Screen Settings, Display Customization, 또는 Custom Animation.
- 딸깍 하는 소리 Upload, Import, or the plus icon.
- Select your GIF or JPG file.
- Use the preview tool to resize or crop the image.
- Confirm the preview.
- 딸깍 하는 소리 적용하다, 구하다, 또는 Sync to Device.
- Wait until the transfer is fully complete before disconnecting the keyboard.
The screen should refresh after synchronization. Large GIFs may require more time to transfer than static JPG images.
2.4 Creative Ideas for the Touchscreen
Once your first upload works, there are plenty of ways to use the display:
- Add an animation of your favorite game character.
- Display a gaming team or esports logo.
- Create a personal nameplate or digital signature.
- Use a compact game map as a quick reference.
- Add a minimal desktop animation that matches your RGB lighting.
- Upload seasonal graphics for holidays or special events.
- Display a productivity reminder or shortcut reference.
The touchscreen is one of the defining features of the AULA L99 customizable keyboard, so experimenting with different designs is part of the fun.
3. How to Create a Gaming Macro on the AULA L99
A macro records a sequence of keystrokes and assigns that sequence to a single key. It can simplify repetitive actions in games, creative software, spreadsheets, and other applications.
For example, instead of manually pressing several keys in sequence, you can create a macro that reproduces the sequence with one keypress.
Fair-play reminder: Some competitive games prohibit automated inputs, repeated actions, or multi-action macros. Check the game’s rules and anti-cheat policy before using macros online. A convenient shortcut is not worth turning your account into a cautionary tale.
3.1 Record a New Macro
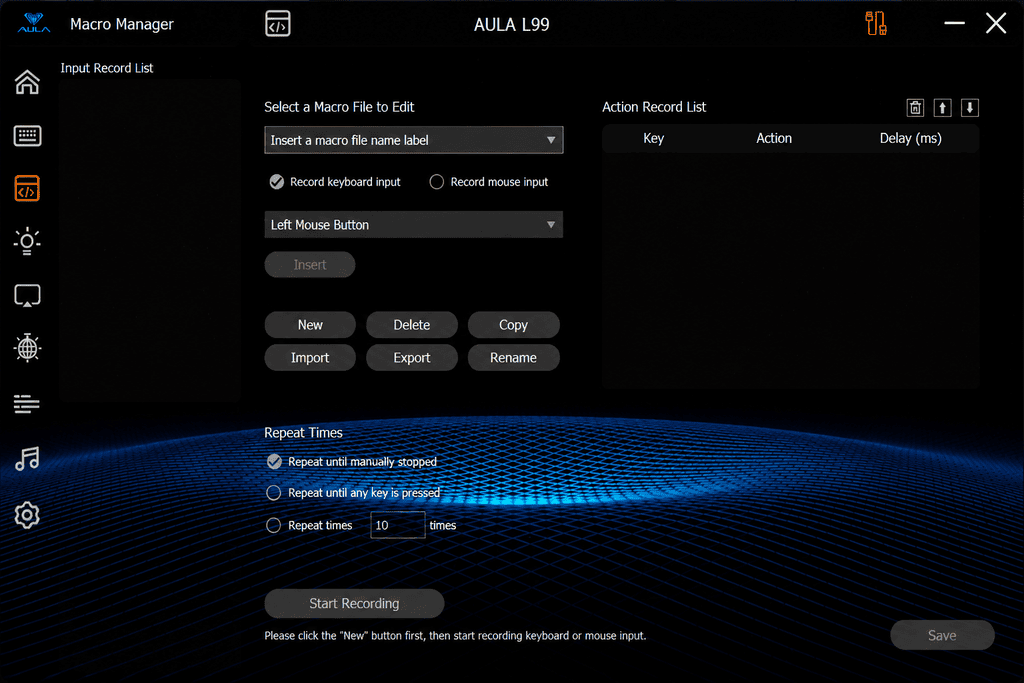
To create a macro in A HUB:
- Open the AULA L99 driver.
- 선택하다 Macro Settings, Macro Manager, or a similarly named tab.
- 딸깍 하는 소리 새로운, Create Macro, or the plus icon.
- Enter a descriptive name, such as:
- Editing Shortcut
- Game Combo
- Repeated Command
- Productivity Sequence
- 딸깍 하는 소리 Record.
- Press the desired keys in the correct order.
- 딸깍 하는 소리 Stop when the sequence is complete.
- Review the recorded keystrokes and delays.
- Remove any accidental inputs.
- 딸깍 하는 소리 구하다.
Use clear names for your macros. “Game Combo 01” is much easier to recognize later than “New Macro Copy 7 Final Final.”
3.2 Adjust Macro Delays
Timing is often the difference between a reliable macro and one that fails unpredictably.
Macro editors usually display delays in milliseconds between key events. If a sequence runs too quickly, the game or application may not register every input. If it runs too slowly, the macro may feel unresponsive.
For better results:
- Record the sequence at a natural speed first.
- Test it in a safe environment.
- Increase delays when inputs are being skipped.
- Reduce delays gradually if the sequence feels too slow.
- Keep press and release events in the correct order.
- Avoid setting every delay to zero.
Some applications also depend on animation timing, cooldowns, or interface response times. A delay that works in one game may not work in another.
3.3 Bind the Macro to a Key
After saving the macro, assign it to a key:
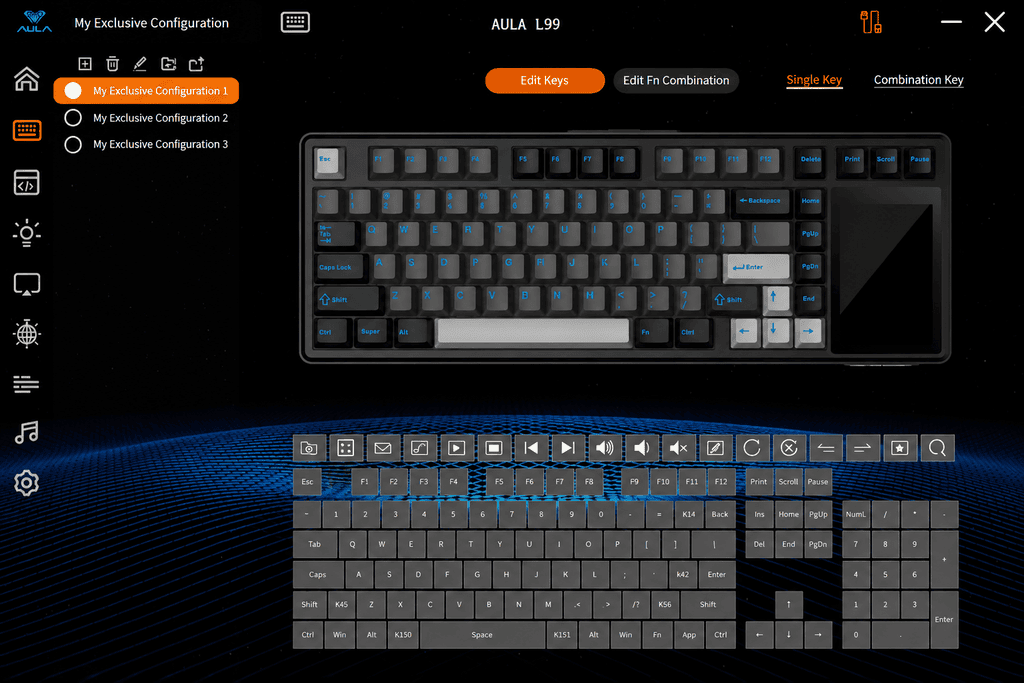
- Open Key Remapping, Key Assignment, 또는 Customize Keys.
- Select the target key on the virtual keyboard.
- 선택하다 매크로 as the new function.
- Select the macro you created.
- Choose the playback behavior, if available.
- 딸깍 하는 소리 적용하다 또는 Save to Device.
- Test the assigned key.
It is safer to begin with a key you rarely use, such as a function key. Avoid replacing essential keys until you know the macro works correctly.
3.4 Macro Playback Options
Depending on the software version, you may see options such as:
- Play once: Executes the sequence one time per press.
- Repeat a fixed number of times: Runs the macro for a specified number of cycles.
- Repeat while held: Continues until you release the assigned key.
- Toggle playback: Starts on the first press and stops on the next.
- Repeat until interrupted: Continues until another action stops it.
Use continuous or repeated playback carefully. An incorrect looping macro can keep sending inputs and make the computer appear unresponsive.
3.5 Useful Macro Ideas Beyond Gaming
Macros are not limited to game combos. They can also speed up everyday tasks:
- Open frequently used applications.
- Insert common text templates.
- Execute editing shortcuts.
- Automate spreadsheet key sequences.
- Control streaming software.
- Simplify repetitive design commands.
- Create shortcuts for coding or content production.
Do not store passwords or sensitive personal information in keyboard macros. Anyone with access to the keyboard could trigger them.
4. Everyday Uses for the AULA L99 Touchscreen
The display is more than a place for animated GIFs. It also provides practical information and quick-access controls.
4.1 View Essential Keyboard Information
Depending on the selected interface and firmware, the screen may display:
- Time and date
- Battery level
- Current connection mode
- Device status
- Lighting or performance information
Battery monitoring is especially helpful when using Bluetooth or 2.4GHz wireless mode.
4.2 Use Built-In Touchscreen Tools
The L99 touchscreen may include several interactive functions:
- Virtual numpad: Useful when the compact layout does not include a traditional physical number pad.
- Calculator: Provides quick calculations without opening another application.
- Mouse control: Offers basic pointer input in an emergency.
- Volume adjustment: Lets you change audio levels from the screen.
- Brightness controls: Adjusts compatible display or keyboard settings.
- Settings navigation: Provides access to selected keyboard controls.
Swipe or tap gestures may vary by firmware. Use deliberate, light touches rather than treating the screen like it owes you money.
4.3 Switch Between Connection Modes
The AULA L99 supports three connection methods:
| 방법 | Best Use | Main Advantage |
|---|---|---|
| C형 유선 | Setup, gaming and firmware updates | Stable connection and low latency |
| 2.4GHz 무선 | Gaming and everyday desktop use | Wireless convenience with responsive performance |
| 블루투스 5.0 | Laptops, tablets and multiple devices | Easy device switching |
The keyboard also includes an 8000mAh 배터리, making it suitable for extended wireless use. Battery life will vary with screen activity, lighting brightness, connection mode, and usage patterns.
When performing firmware updates, uploading animations, or troubleshooting driver detection, use the wired connection unless AULA’s official instructions say otherwise.
5. AULA L99 Troubleshooting Guide
Most setup problems are related to connection mode, software compatibility, file preparation, or incomplete synchronization.
The Driver Does Not Detect the Keyboard
Try these steps in order:
- Connect the keyboard directly with its USB cable.
- Switch it to wired mode.
- Try another USB port.
- Avoid an unpowered USB hub.
- Restart A HUB with administrator privileges.
- Close other keyboard configuration programs.
- Restart the computer.
- Confirm that the driver matches the exact L99 model.
- Test another compatible data cable.
Some USB cables provide power but do not support data. The keyboard may light up while remaining invisible to the driver, which is a surprisingly convincing little trick.
The GIF Does Not Display Correctly
Check the following:
- Confirm that the file is a supported GIF or JPG.
- Resize it close to 320 × 480 pixels.
- Reduce the GIF’s file size or frame count.
- Try a shorter animation.
- Keep the keyboard connected during synchronization.
- 딸깍 하는 소리 적용하다 또는 Save to Device after uploading.
- Restart the driver and upload the file again.
If a GIF continues to fail, test with a simple JPG. If the JPG works, the issue is probably related to the GIF’s encoding, size, or animation complexity.
The Macro Is Unstable or Does Not Work
Possible solutions include:
- Increase the delay between inputs.
- Check that the target key is not assigned to another function.
- Verify that the macro was saved and applied.
- Re-record the macro at a natural speed.
- Test the macro in a text editor to confirm its input sequence.
- Check whether the game blocks macro functions.
- Avoid running multiple peripheral tools simultaneously.
Should You Update the Firmware?
Firmware updates can fix bugs, improve compatibility, or add features. However, firmware should only be updated when necessary and through an official AULA source.
Before updating:
- Verify the exact keyboard model and hardware revision.
- Read the official update instructions.
- Use a stable wired connection.
- Avoid disconnecting the keyboard during the update.
- Do not close the updater until it confirms completion.
- Export or record important custom settings when possible.
Never install firmware intended for a different AULA model. A similar name does not guarantee compatible hardware.
6. Tips for Getting More From the AULA L99
Once the basic setup is complete, a few habits can make customization easier and more reliable.
Create Different Profiles
Build separate configurations for:
- 경쟁 게임
- Casual gaming
- 사무직
- Video editing
- Streaming
- General desktop use
Where supported, assign different key mappings, macros, lighting effects, and screen graphics to each profile.
Back Up Your Settings
If A HUB includes an export function, save a backup after completing your configuration. This can save time after a software reinstall, firmware update, or system reset.
Optimize Wireless Battery Life
To extend battery life:
- Reduce RGB brightness.
- Use simpler lighting effects.
- Lower the screen brightness.
- Shorten screen-on time where supported.
- Turn the keyboard off during long periods of inactivity.
- Use wired mode while charging.
The L99’s large battery provides substantial capacity, but the touchscreen and RGB lighting still consume power.
Explore the Hardware
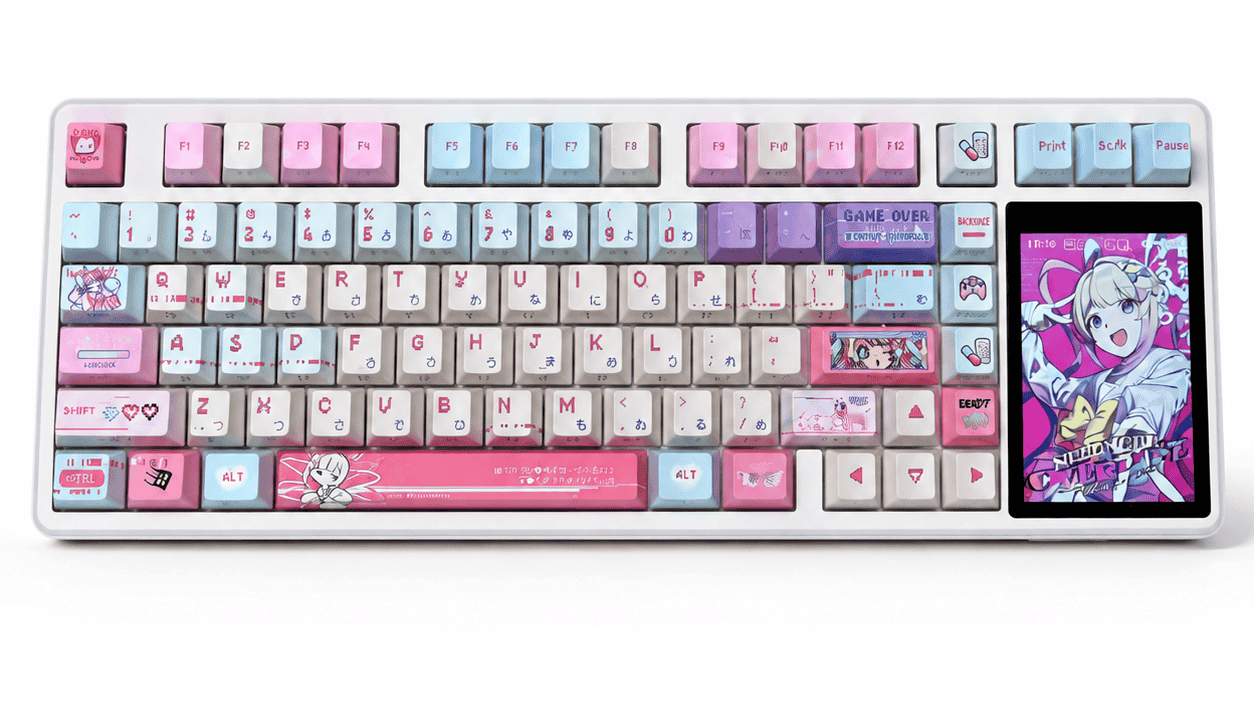
Beyond its display, the keyboard features:
- An 84-key compact layout
- Gasket-mounted construction
- Multi-layer internal damping
- Hot-swappable switches
- 2.4GHz, Bluetooth 5.0, and Type-C connectivity
- Multiple switch and color options
마지막으로
The AULA L99 becomes much more interesting once you move beyond its default settings. Its touchscreen can serve as a custom animation display, a virtual numpad, a calculator, and a compact control interface. Meanwhile, key remapping and macros can create more efficient workflows for gaming, editing, streaming, and office tasks.
Start with one simple customization: upload a properly sized JPG or short GIF. Then create a basic macro, test its timing, and assign it to a rarely used key. Once those two features are working, building profiles and experimenting with the rest of the keyboard becomes far easier.
With the correct driver, a wired connection, and a little careful setup, the AULA L99 goes from being a mechanical keyboard with a screen to a genuinely personalized desktop tool.
 English
  German
  Portuguese
  Spanish
  Italian
  Finnish
  French
  Japanese
  Korean
  Swedish